Difference between revisions of "Workflow : Information Retrieval and Extraction Basic"
(→Step 1: Pubmed Search) |
Anote2Wiki (talk | contribs) (→Pre-Configuration) |
||
| (29 intermediate revisions by 2 users not shown) | |||
| Line 1: | Line 1: | ||
__TOC__ | __TOC__ | ||
[[Category:HOWTOs]] | [[Category:HOWTOs]] | ||
| + | |||
| + | == Pre-Configuration == | ||
| + | |||
| + | The Information Retrieval and Extraction Basic workflow is a specific workflow constructed for less user interaction. Unlike the other workflows, here you cannot configure the Corpus, NER and RE processes during the wizard configuration. | ||
| + | Changes in these configurations need to be done in the default settings, using the Preferences option in the Settings Menu and selecting Workflow -> Basics. | ||
| + | |||
| + | |||
| + | [[File:Workflow_Basics_Preconfiguration.png|center]] | ||
| + | |||
| + | |||
| + | === Corpus === | ||
| + | |||
| + | '''Corpus Name''': Corpus Name | ||
| + | |||
| + | ==== Corpus Type ==== | ||
| + | |||
| + | ''' Abstract :''' Only publications with abstracts will be considered. | ||
| + | |||
| + | ''' Full Text :''' Only publications with full Text / PDF will be considered. | ||
| + | |||
| + | ''' Hybrid :''' Publications with either full text or abstract will be considered. | ||
| + | |||
| + | ''' Retrieve PDF :''' Only publications with full Text / PDF will be considered, and a Journal Retrieval Process will be launched to collect all selected documents | ||
| + | |||
| + | |||
| + | [[File:Workflow_Basics_Preconfiguration.png|center]] | ||
| + | |||
| + | |||
| + | === NER === | ||
| + | |||
| + | Using the combo box in Workflow -> Basics -> NER, you can select the NER process configuration that is more suitable. | ||
| + | |||
| + | |||
| + | [[File:Workflow_Settings_NER_Selection.png|center]] | ||
| + | |||
| + | |||
| + | Using Workflow -> Basics -> NER -> [NER Process] you can configure the NER default options | ||
| + | |||
| + | Example: | ||
| + | |||
| + | |||
| + | [[File:Workflow_Settings_NER_Selection_Example.png|center]] | ||
| + | |||
| + | |||
| + | === RE === | ||
| + | |||
| + | Using the combo box in Workflow -> Basics -> RE, you can select the RE process configuration that is more suitable. | ||
| + | |||
| + | |||
| + | [[File:Workflow_Settings_RE_Selection.png|center]] | ||
| + | |||
| + | |||
| + | Using Workflow -> Basics -> RE -> [RE Process], you can configure the RE default options | ||
| + | |||
| + | Example: | ||
| + | |||
| + | |||
| + | [[File:Workflow_Settings_RE_Selection_Example.png|center]] | ||
| + | |||
== Operation == | == Operation == | ||
| − | The Information Retrieval and Extraction | + | The basic workflow for Information Retrieval and Extraction allows you to set up some tasks in @Note, including the Journal Retrieval, Corpus creation, NER and RE Processes with a minimal set of configuration steps. |
To run the workflow, you must select the option '''Workflow -> Information Retrieval and Extraction Basic''' on the Menu Bar. | To run the workflow, you must select the option '''Workflow -> Information Retrieval and Extraction Basic''' on the Menu Bar. | ||
| Line 9: | Line 68: | ||
[[File:Workflow_Basics1.png||1500px|center]] | [[File:Workflow_Basics1.png||1500px|center]] | ||
| + | |||
== Step 1: Pubmed Search == | == Step 1: Pubmed Search == | ||
| − | in first panel | + | in the first panel, you can select a basic query or an advanced query to submit to Pubmed Search. |
| + | |||
| + | === Basic search === | ||
| − | + | In the Basic search tab, you can only select keywords and organism. | |
| − | |||
| − | [[File: | + | [[File:Workflow_Basic_2a.png|center|800px]] |
=== Advanced Search === | === Advanced Search === | ||
| − | In Advanced search | + | In Advanced search, you can restrict the search to a specific organism or keywords and can also select the name of an author, a journal, the type of article, if the article is present in PubMed Central or Medline, if full text is available or select a publication date range. |
| + | |||
| + | |||
| + | [[File:Workflow_Basic_2b.png|center|800px]] | ||
| − | |||
== Step 2: Dictionaries Selection == | == Step 2: Dictionaries Selection == | ||
| + | |||
| + | In the next panel, '''select dictionaries''', dictionaries can be added to the set that will be used in the NER process. | ||
| + | When all dictionaries are selected, press '''Next'''. | ||
| + | |||
| + | |||
| + | [[File:Workflow_Basic_3.png|center|800px]] | ||
| + | |||
| + | |||
== Step 3: Class(es) Selection == | == Step 3: Class(es) Selection == | ||
| − | == | + | |
| + | In the next panel, for all '''dictionaries''' previously selected you can '''filter for classes'''. | ||
| + | Pressing '''Next''', the Workflow is started. | ||
| + | |||
| + | |||
| + | [[File:Workflow_Basic_4.png|center|800px]] | ||
| + | |||
| + | |||
| + | == Processing == | ||
| + | |||
| + | As the process proceeds you can check the progress status looking at the bar. | ||
| + | |||
| + | |||
| + | [[File:Workflow7.png|center]] | ||
| + | |||
| + | |||
| + | == Workflow Report == | ||
| + | |||
| + | As a result of the process, a [[Workflow_report]] is shown. | ||
Latest revision as of 17:14, 8 September 2014
Contents
Pre-Configuration
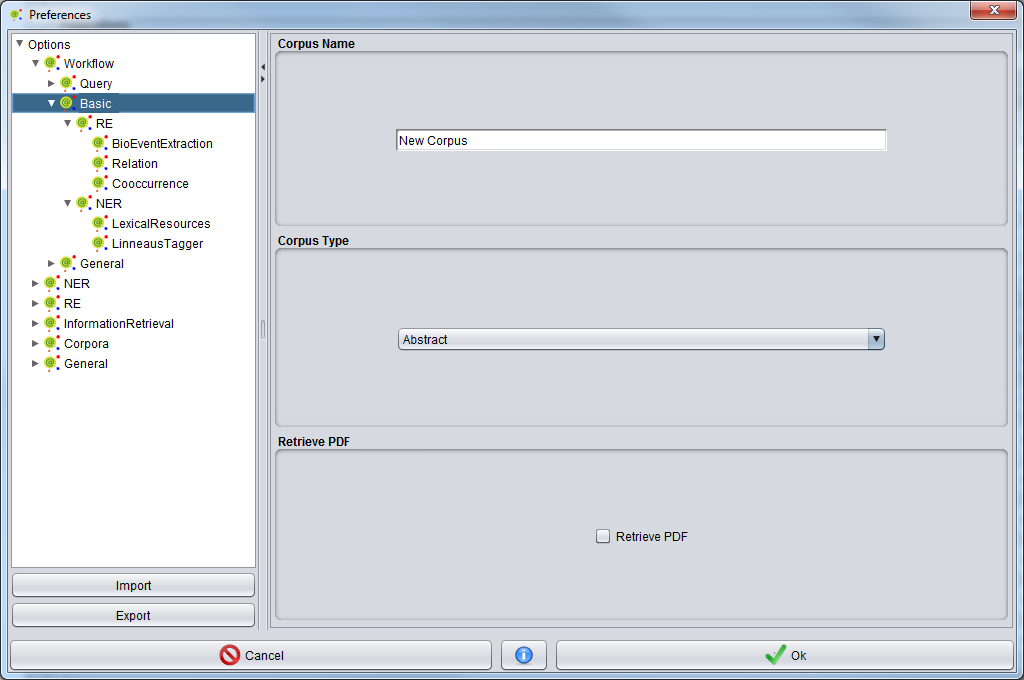
The Information Retrieval and Extraction Basic workflow is a specific workflow constructed for less user interaction. Unlike the other workflows, here you cannot configure the Corpus, NER and RE processes during the wizard configuration. Changes in these configurations need to be done in the default settings, using the Preferences option in the Settings Menu and selecting Workflow -> Basics.
Corpus
Corpus Name: Corpus Name
Corpus Type
Abstract : Only publications with abstracts will be considered.
Full Text : Only publications with full Text / PDF will be considered.
Hybrid : Publications with either full text or abstract will be considered.
Retrieve PDF : Only publications with full Text / PDF will be considered, and a Journal Retrieval Process will be launched to collect all selected documents
NER
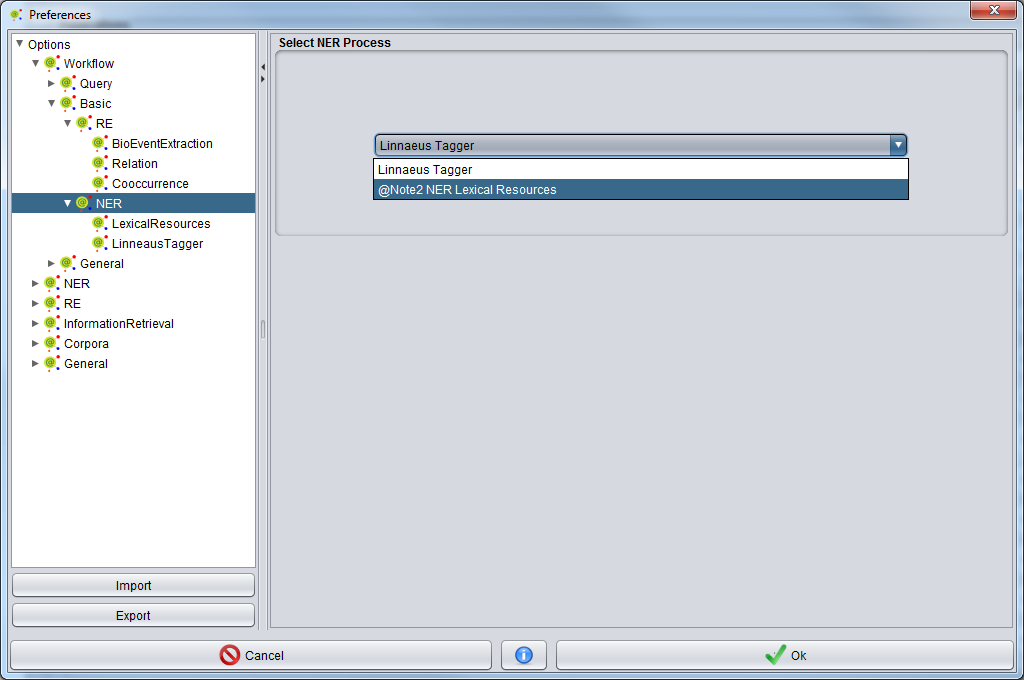
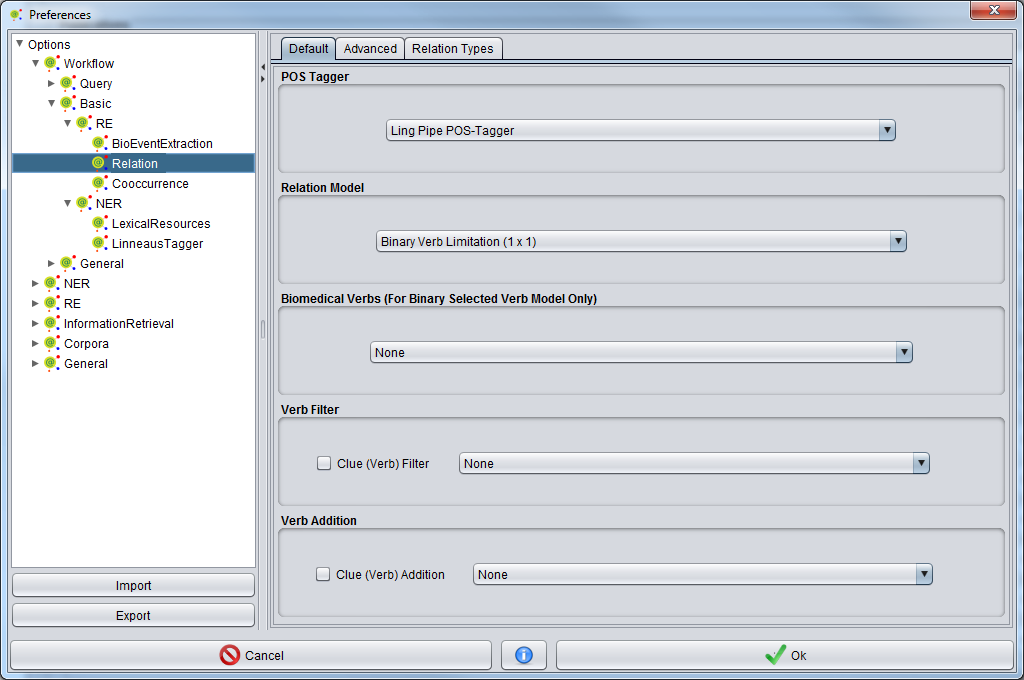
Using the combo box in Workflow -> Basics -> NER, you can select the NER process configuration that is more suitable.
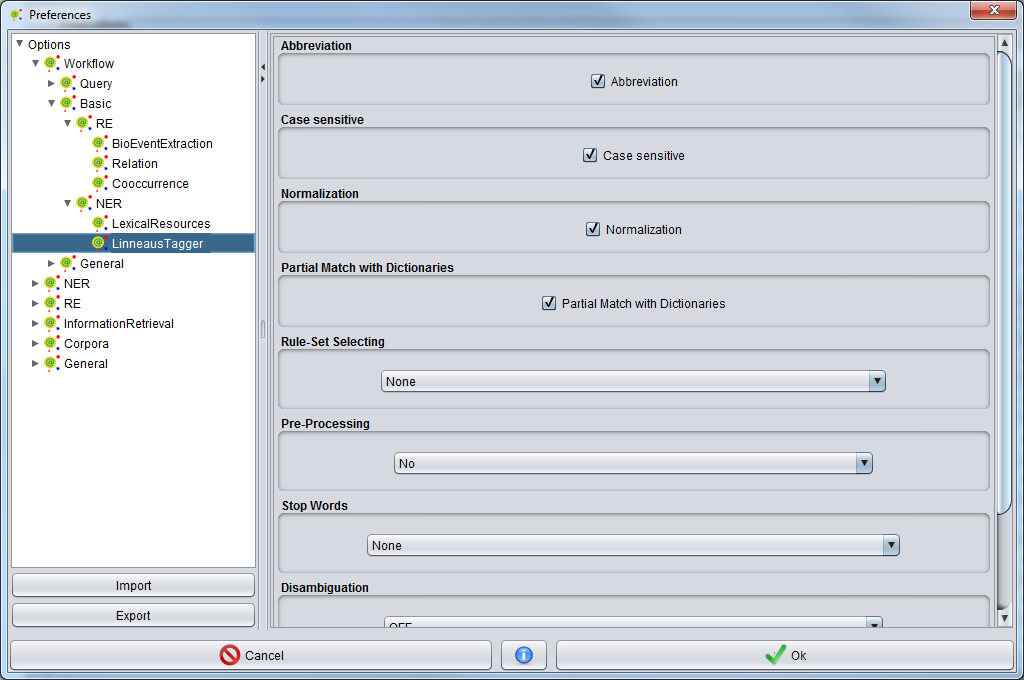
Using Workflow -> Basics -> NER -> [NER Process] you can configure the NER default options
Example:
RE
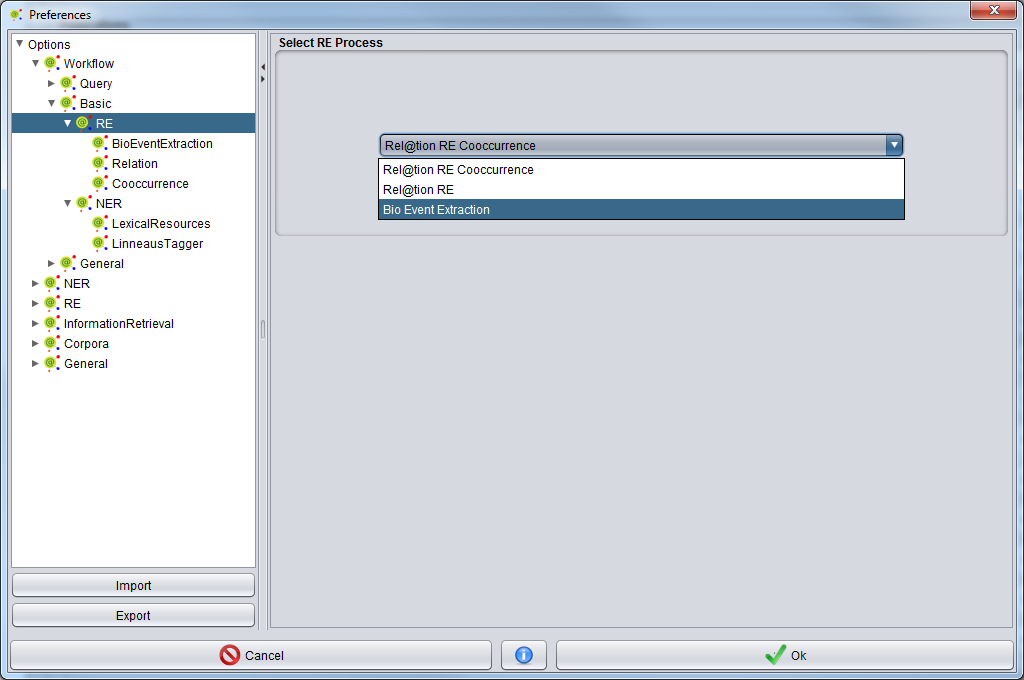
Using the combo box in Workflow -> Basics -> RE, you can select the RE process configuration that is more suitable.
Using Workflow -> Basics -> RE -> [RE Process], you can configure the RE default options
Example:
Operation
The basic workflow for Information Retrieval and Extraction allows you to set up some tasks in @Note, including the Journal Retrieval, Corpus creation, NER and RE Processes with a minimal set of configuration steps.
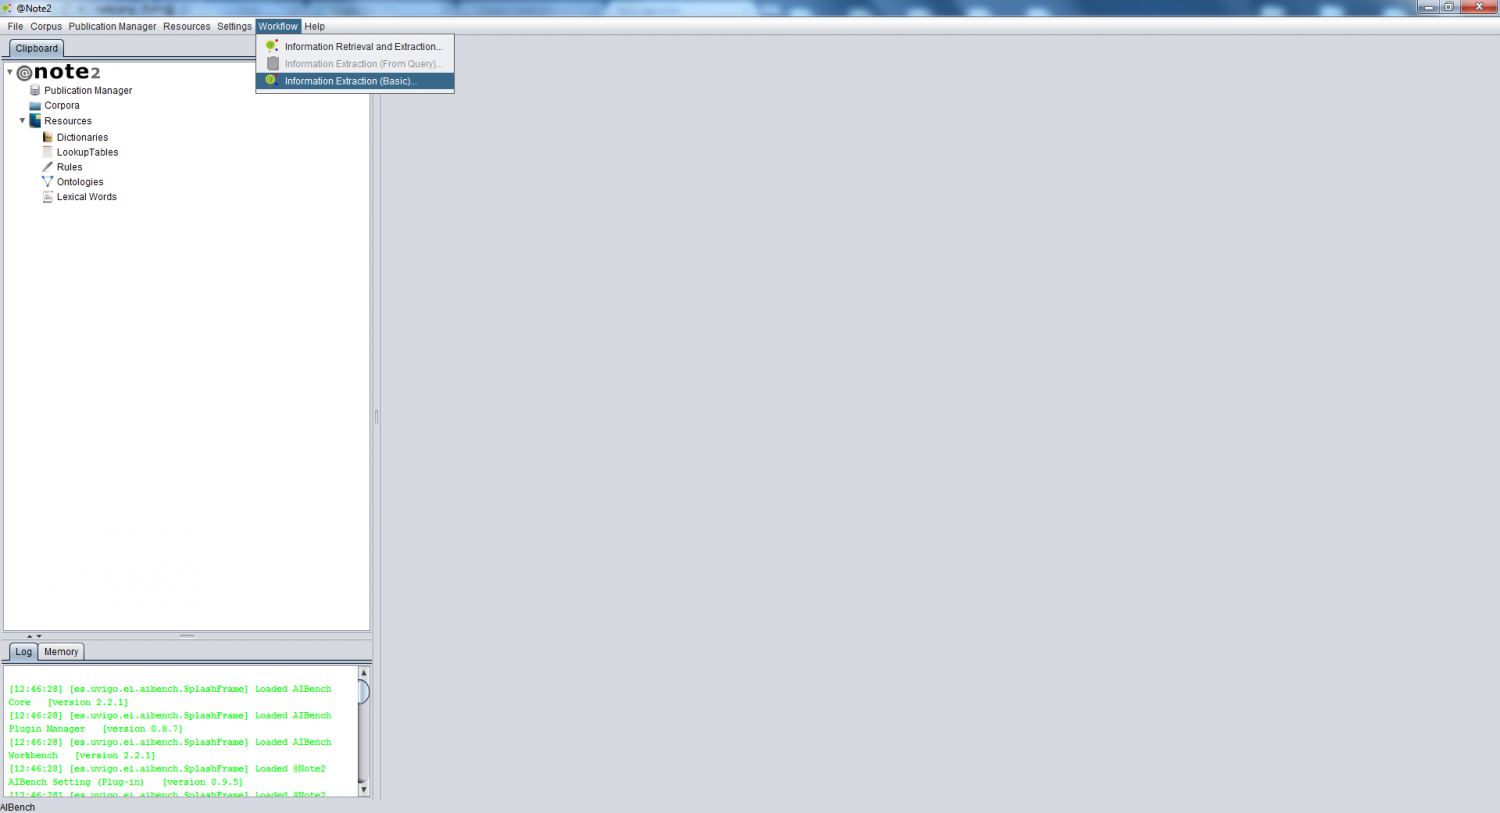
To run the workflow, you must select the option Workflow -> Information Retrieval and Extraction Basic on the Menu Bar.
Step 1: Pubmed Search
in the first panel, you can select a basic query or an advanced query to submit to Pubmed Search.
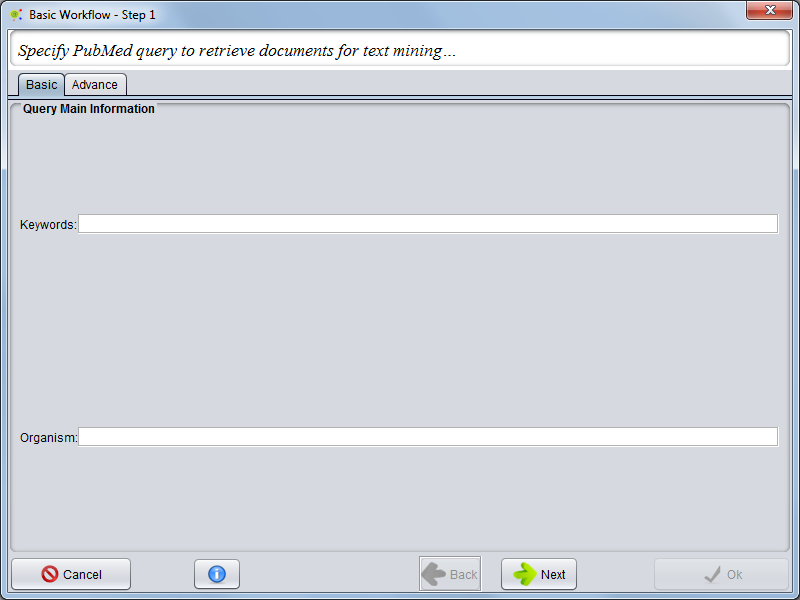
Basic search
In the Basic search tab, you can only select keywords and organism.
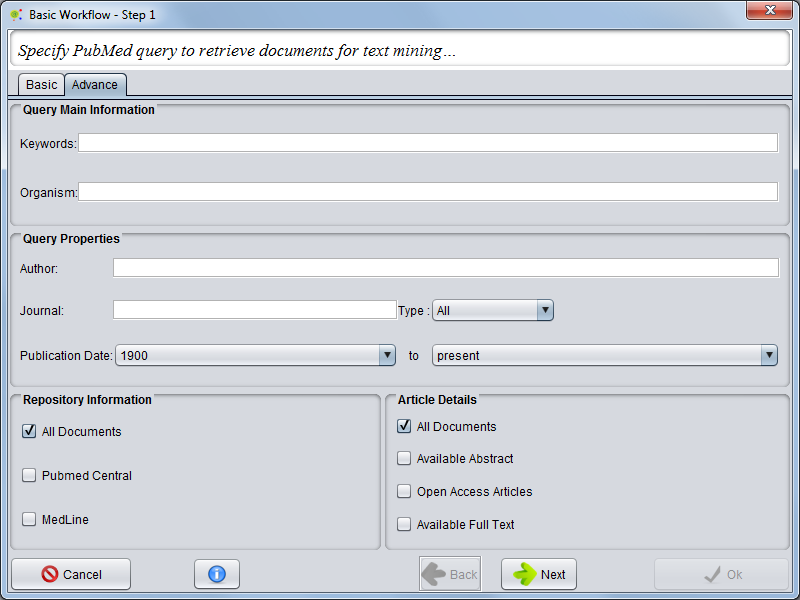
Advanced Search
In Advanced search, you can restrict the search to a specific organism or keywords and can also select the name of an author, a journal, the type of article, if the article is present in PubMed Central or Medline, if full text is available or select a publication date range.
Step 2: Dictionaries Selection
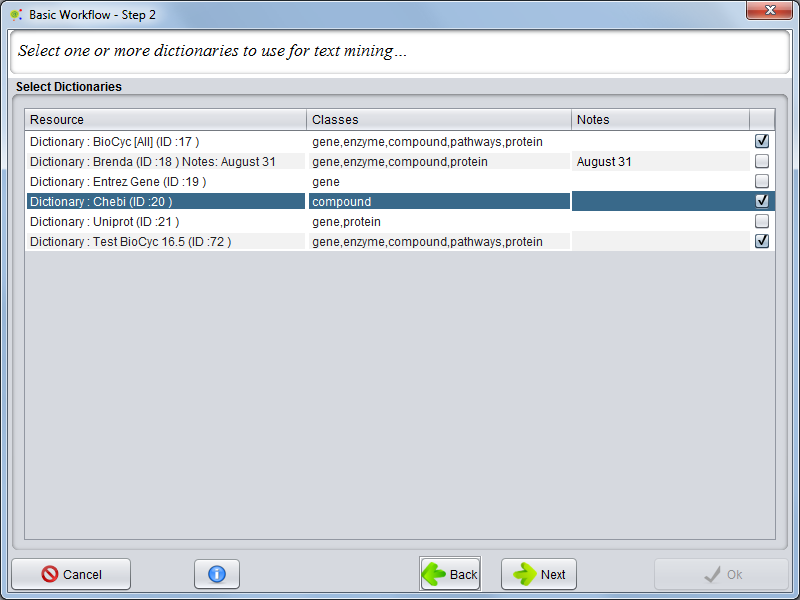
In the next panel, select dictionaries, dictionaries can be added to the set that will be used in the NER process. When all dictionaries are selected, press Next.
Step 3: Class(es) Selection
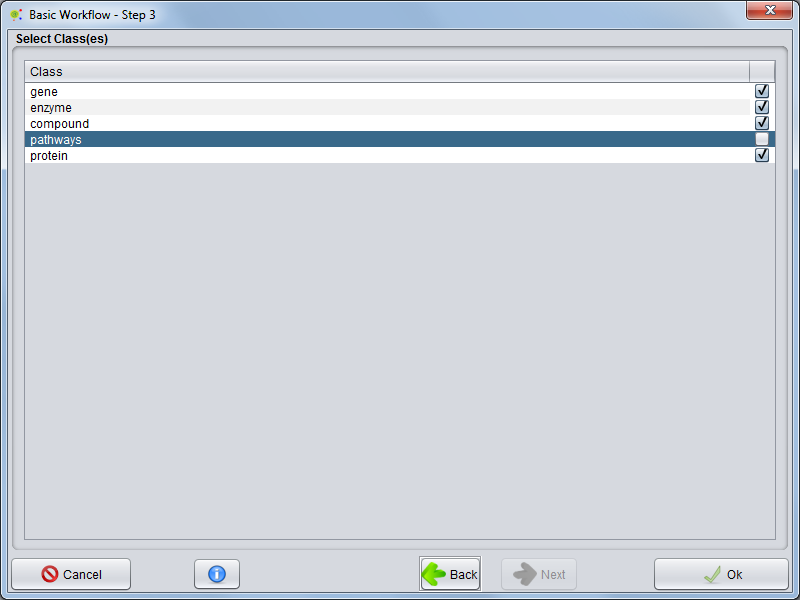
In the next panel, for all dictionaries previously selected you can filter for classes. Pressing Next, the Workflow is started.
Processing
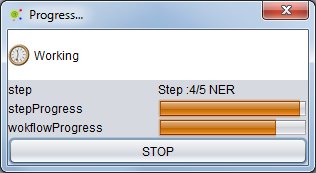
As the process proceeds you can check the progress status looking at the bar.
Workflow Report
As a result of the process, a Workflow_report is shown.
