Preferences
Contents
Change Settings
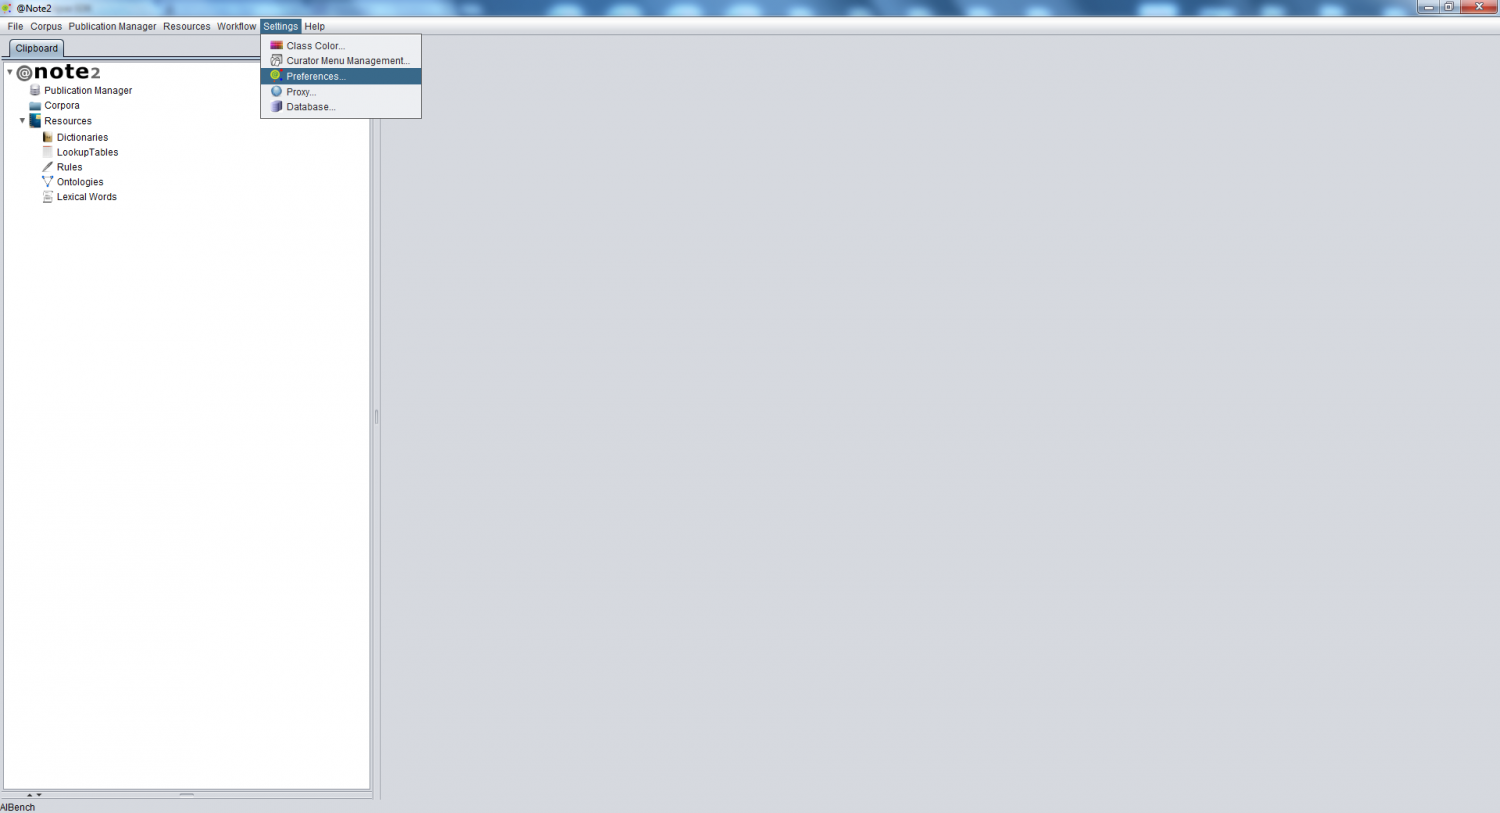
To access @Note Preferences, select Preferences in the Settings menu bar
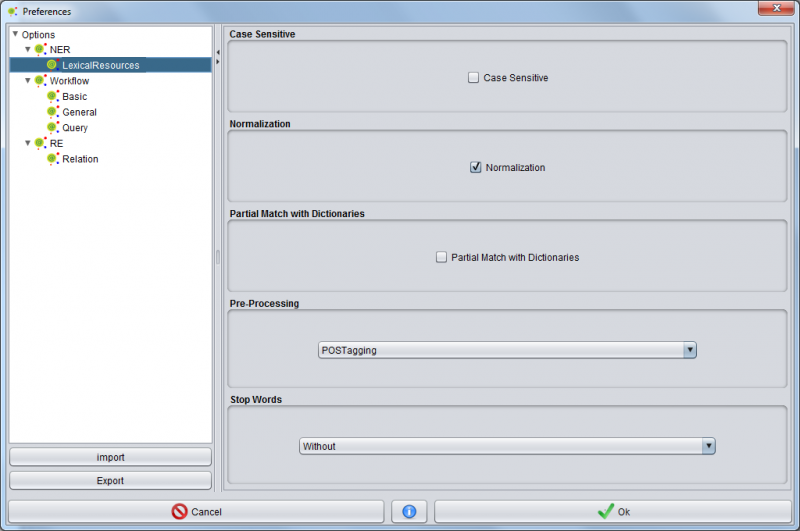
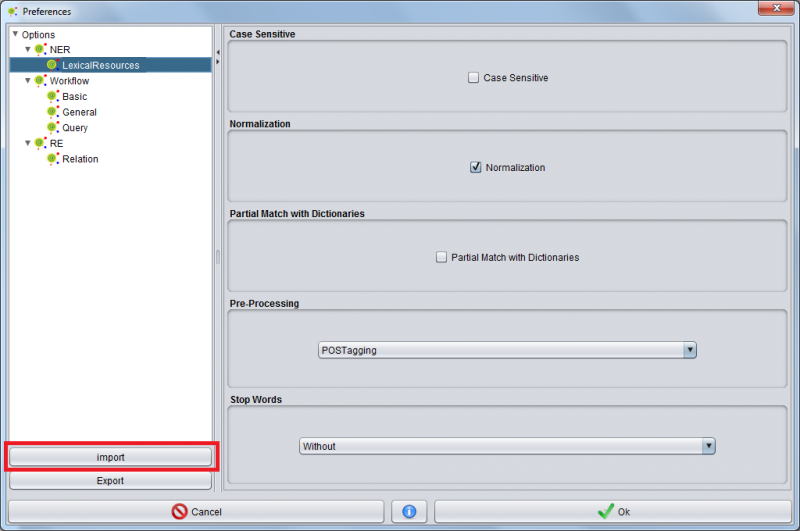
A GUI is opened where at the left you can check the preferences tree.
Each node of tree keeps the preference settings for a specific @Note2 process.
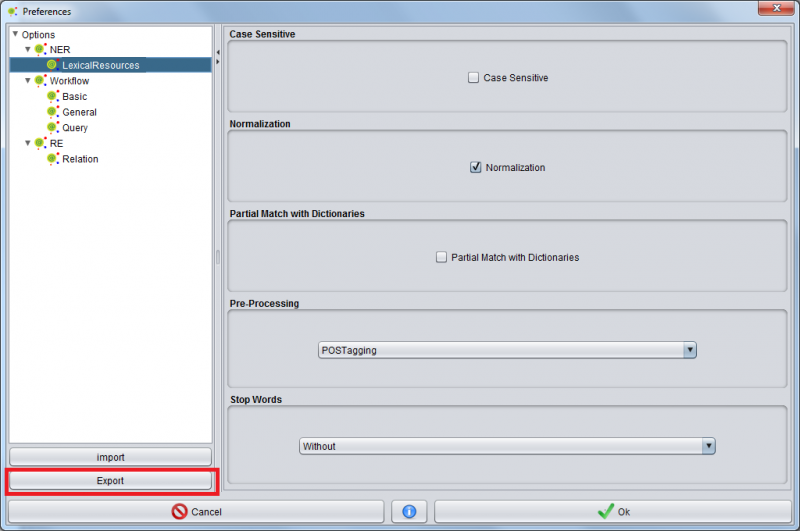
An example is shown for the NER -> NERlexical Resources with the NER Lexical Resource Wizard default settings.
You can navigate in the tree and select which settings are more appropriate.
The specific settings appear in the right hand side.
When all changes are done, confirm by pressing the ok button.
At any time, you can cancel the changes and exit this Preferences GUI by pressing the cancel button
Database Management
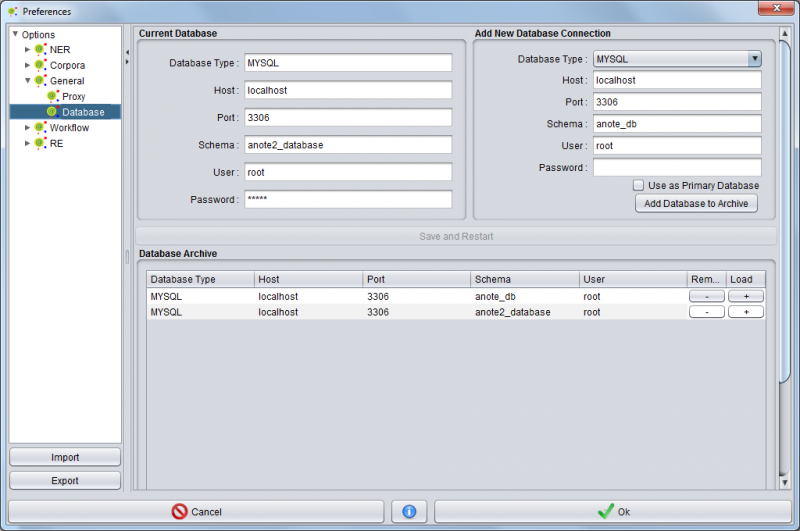
The @Note2 allows management database and user can add, remove or define as primary database in Database Management in Preferences.
Add New Database Connection
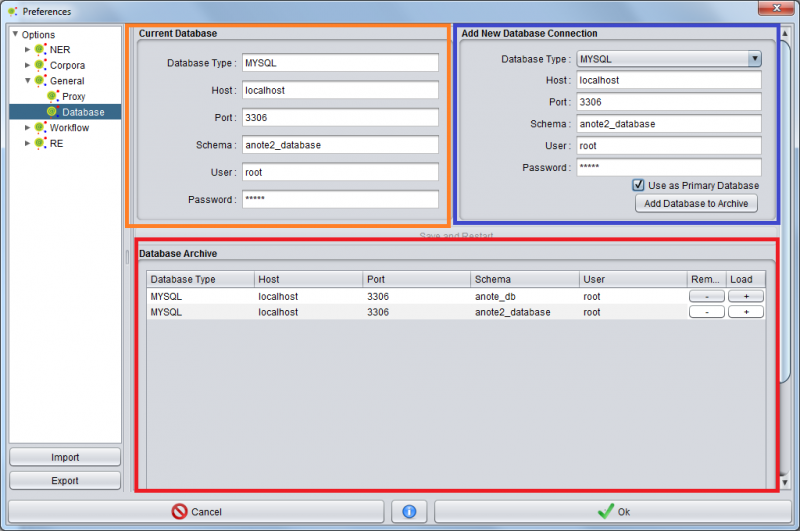
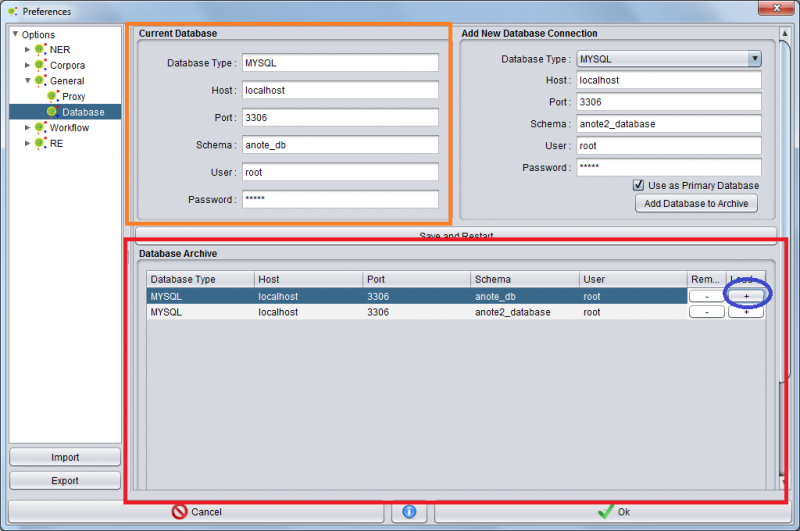
User can add a new database access filling database credential in Add New Database Connection Section ( in blue ) and press Add Database to archive Button. User can choose database name, host , port, root-user and its password. If Database configuration are correct the database configuration will be added to database archive (in red) and if check box Use as Primary Database is selected new database credential also be added as primary database (in orange).
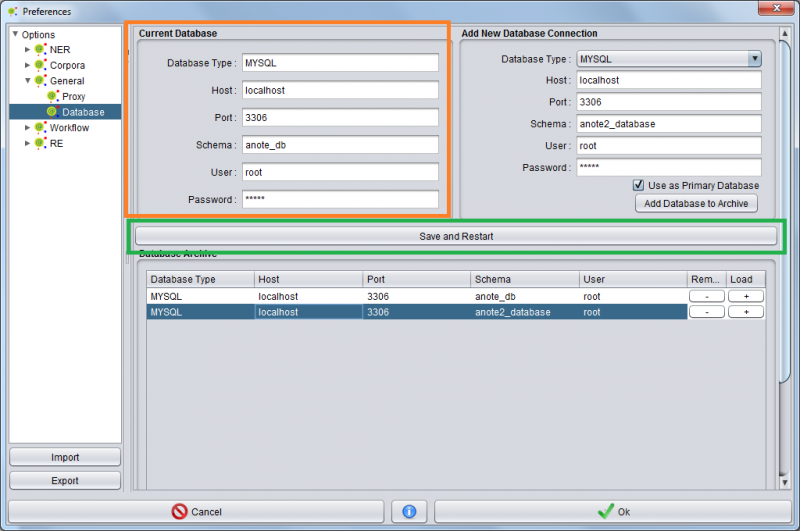
For applying new Primary Database user must restart @Note2 (see apply section above)
Define a primary Database from Database Archive
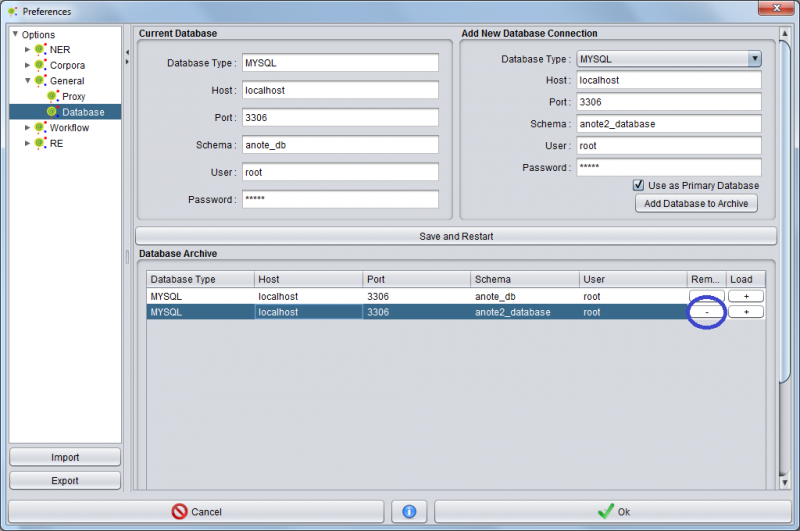
Remove Database Connection from Archive
Apply Settings
Proxy
Export Settings
The Default Settings in @Note can be exported to a conf file. These files can be imported in another @Note2 installation. After selecting the appropriate default settings, you can export them to a file using the export option in the Preferences GUI. A GUI for file selection is launched where you should select the folder and define the file name. The operation creates a configuration file that can be imported from any @Note2 0.9.7 or later version.
Import Settings
You can import default settings from a file by pressing the import button on the Preferences GUI. A file selection GUI is shown where you must select a conf file previously created by an export operation (see above).
