Difference between revisions of "Corpus Create Annotation Schema By NER Lexical Resources"
(→POS-Tagging) |
(→Select Class ( For each resource)) |
||
| Line 22: | Line 22: | ||
[[Image:NER_ANote_Wizard1b.png|800px|center]] | [[Image:NER_ANote_Wizard1b.png|800px|center]] | ||
| − | == Select Class ( For each resource) == | + | == Select Class ( For each resource) and Case Sensitivity == |
In the next panel, For each '''lexical resource''' previous selected the user can '''filter for classes'''. | In the next panel, For each '''lexical resource''' previous selected the user can '''filter for classes'''. | ||
[[Image:NER_ANote_Wizard2.png|800px|center]] | [[Image:NER_ANote_Wizard2.png|800px|center]] | ||
| + | |||
| + | the user also | ||
== Pre-Processing == | == Pre-Processing == | ||
Revision as of 15:44, 18 December 2012
Contents
Select Option
The user can perform a new NER (Entity recognition) based in Lexical Resources loading Corpus to Clipboard based on previous settings (NER already performed - Same Resources and Same Options).
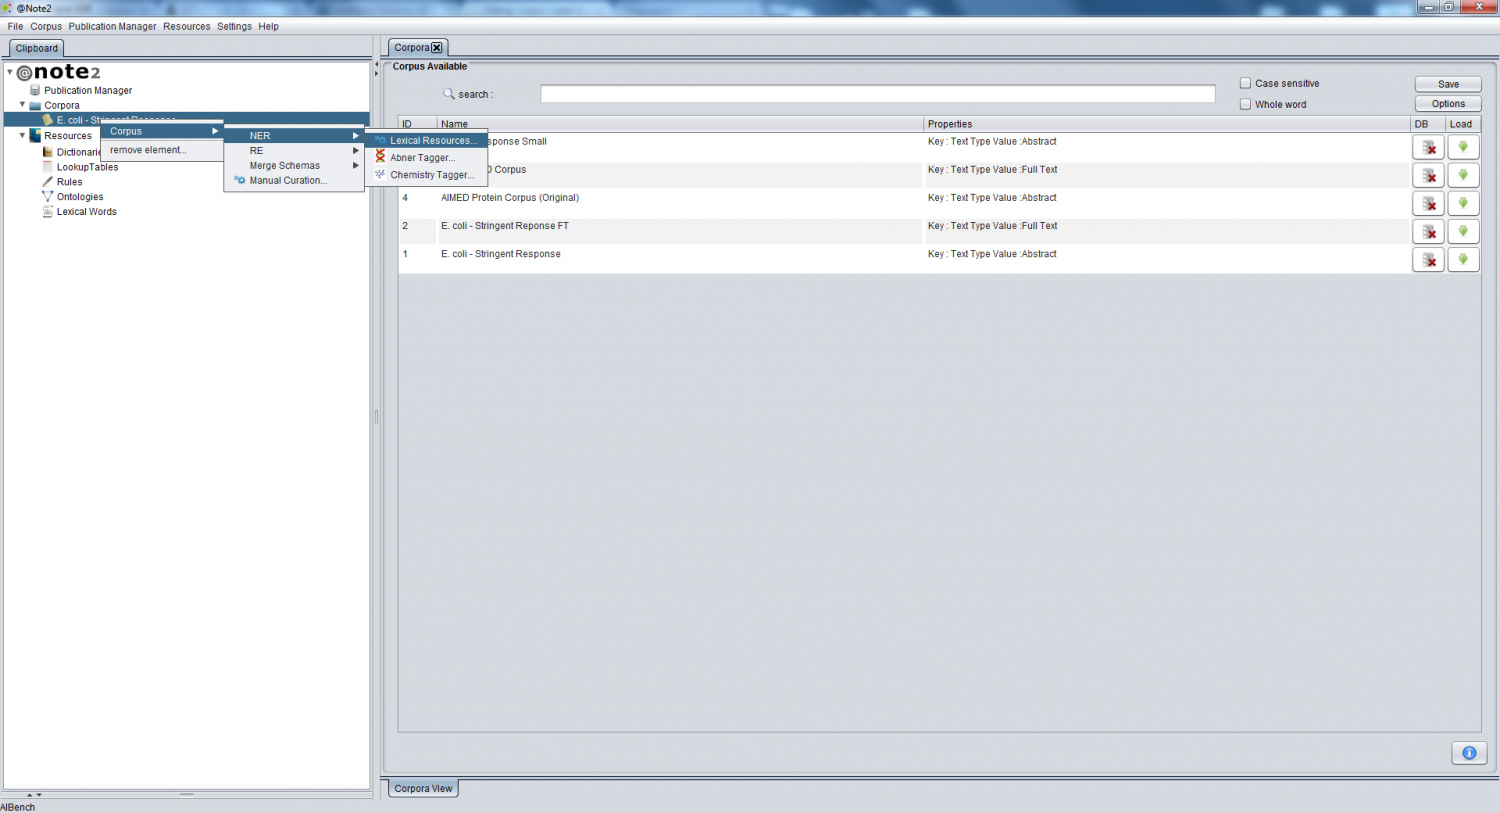
Selecting Corpus, the user must press right mouse button an select Corpus -> NER -> Lexical Resources
New Configuration or Load Configuration
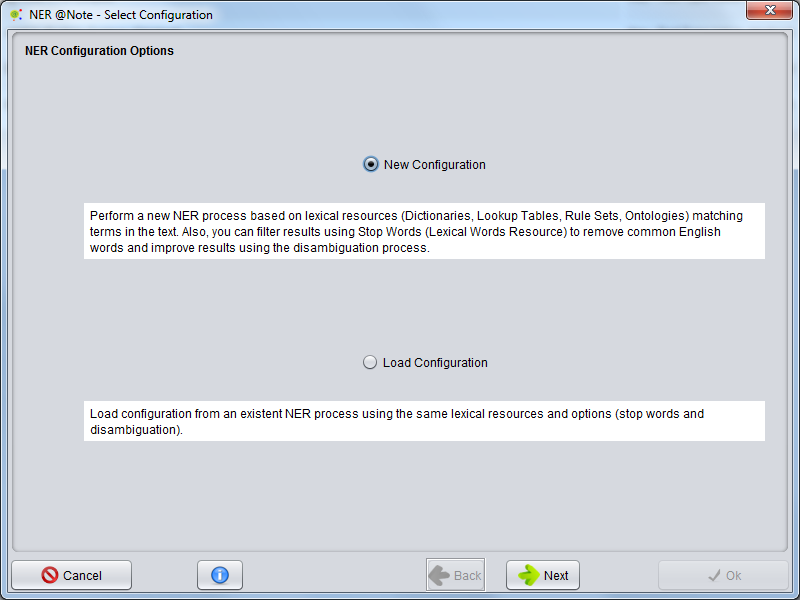
A wizard will be presented. The first allows to select two options: Create a new process ( New Configuration) and Load Configuration from a process that already performed. The user must select New Configuration and press Next button.
Resources Selection
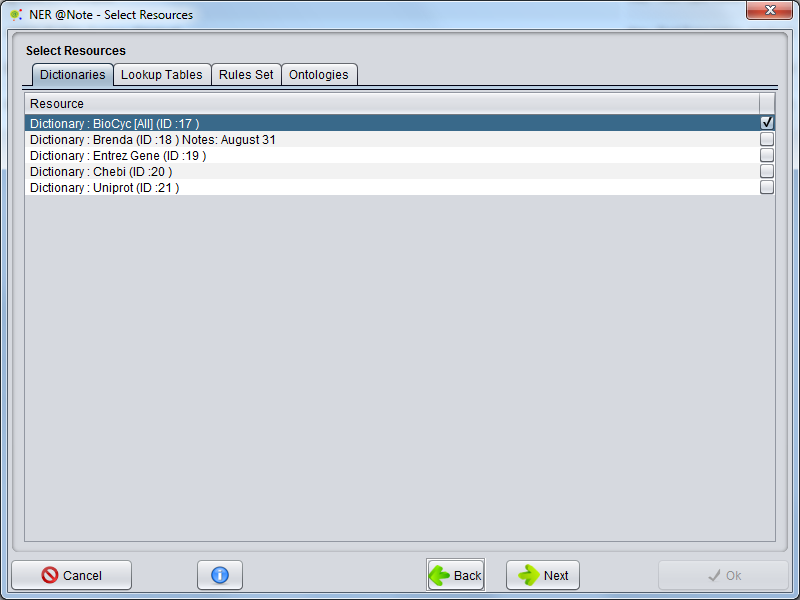
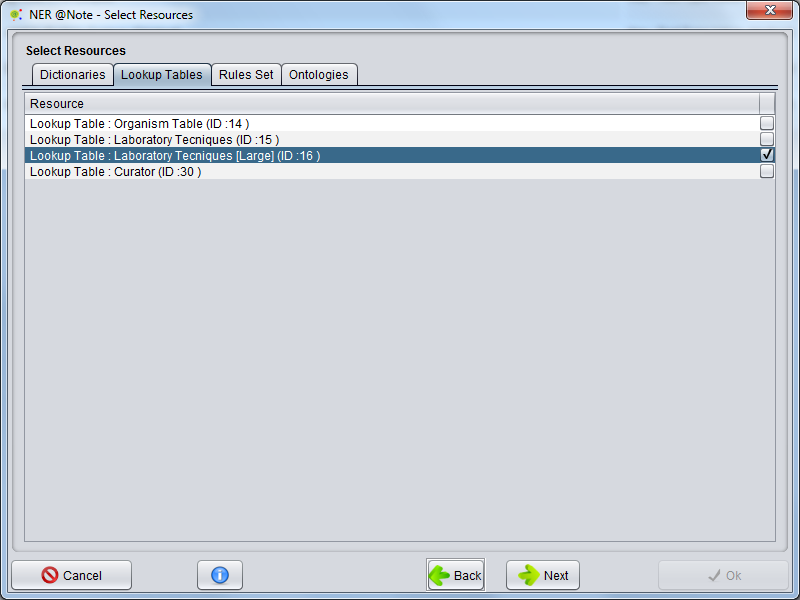
In the next panel, the user must select lexical resources. Here, dictionaries, lookup tables, Rules set and Ontologies can be added to NER process. Selecting tabs the user can change resources type and select different resources. After lexical resources selection, the user must press Next button.
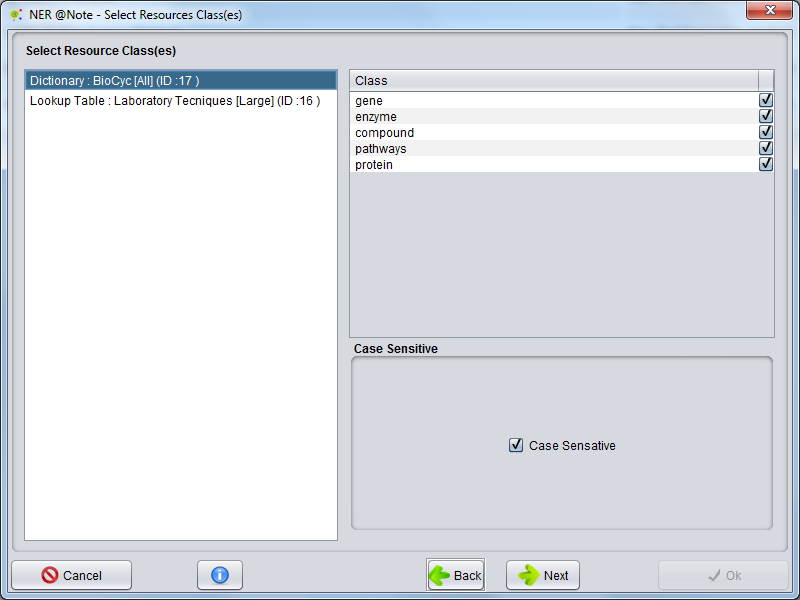
Select Class ( For each resource) and Case Sensitivity
In the next panel, For each lexical resource previous selected the user can filter for classes.
the user also
Pre-Processing
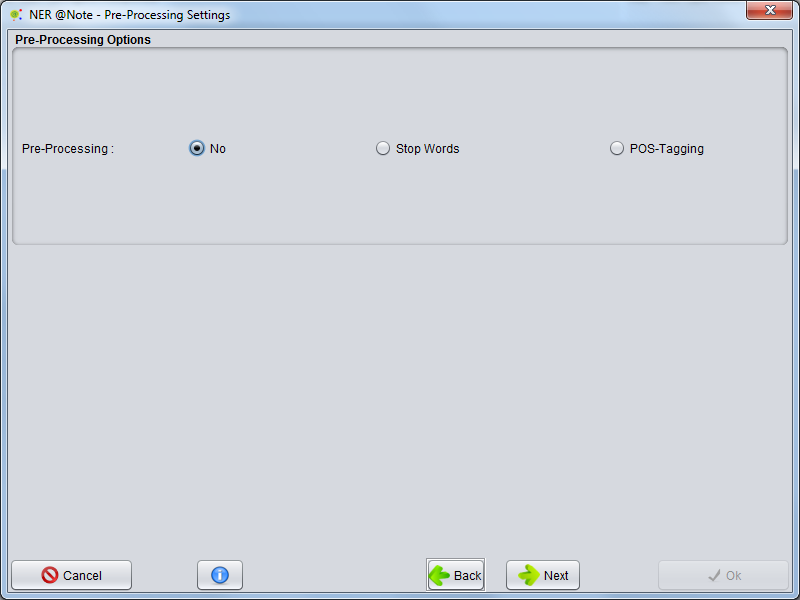
Pre-Processing option allows the user to define restrictions for annotations generated by NER
Without Pre-processing
Selecting option No the processing continuing without any Pre_Processing.
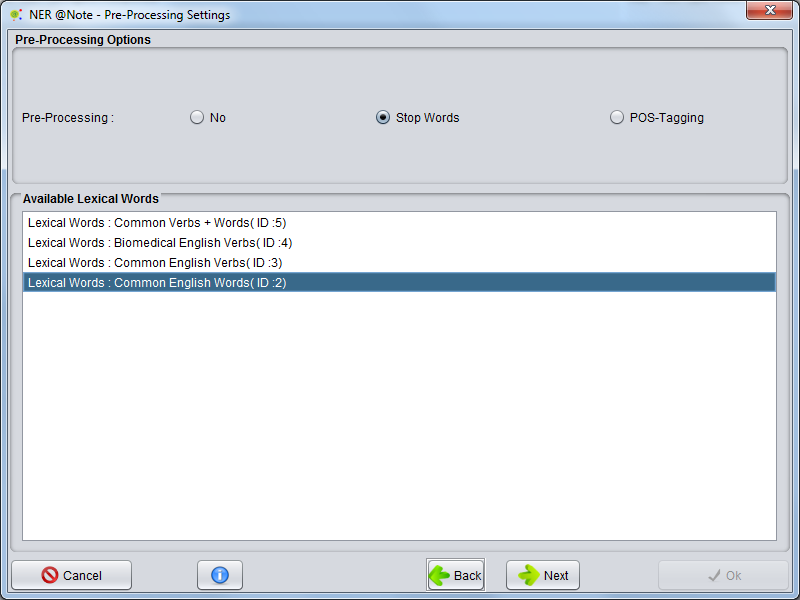
Stop Words
The user can select a list of stop words (Lexical Words Set - Lexical Resources) to perform NER algorithm. Stop words are important for algorithm don't annotate common English word as entities ( Remove false positive annotations). For select this pre-processing option select Stop Words and the panel above select one Lexical Words Resource previous created. For continuing whit NER configuration selct Next Button
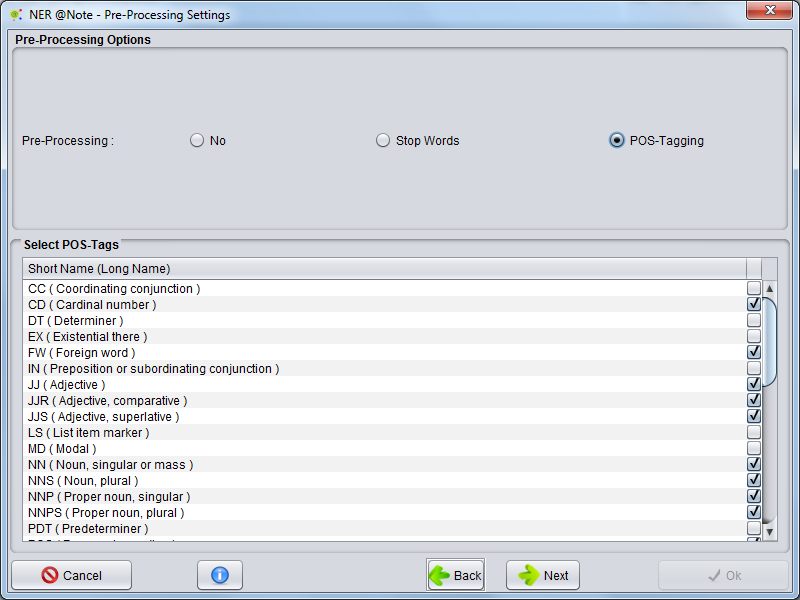
POS-Tagging
The user can filter NER annotations by restricted the annotations to specific grammatically words (Example noun,adjectives,pronoun). For select this pre-processing option select POS-Tagging an in panel above (Select POS-tags) select POS-Tags which are considered to annotation.
Normalization
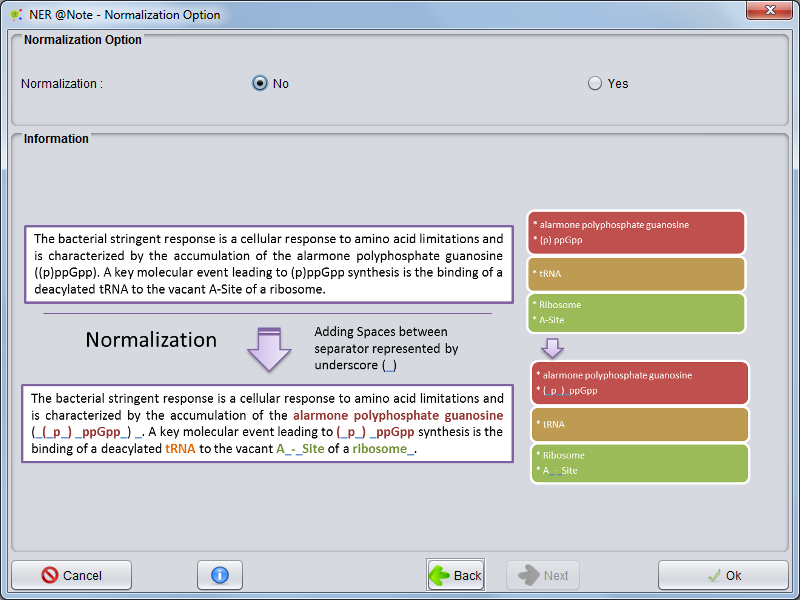
The last panel, The user could select a Normalization option. The Normalization options permits adding white space between words delimiters and increase the entity recognition. This option cahnge the original offsets for text.
The configurations have been made, the Ok button must be pressed. All time the user could cancel operation clinking on cancel button.
Performing
NER operation will start and a small window will appear, indicating the execution of the operation. The NER operation will take a few minutes or hours depending number of documents, document size and total resources terms.
When process finishing , a new NER Process object will be added to the Corpus Process View.
