Difference between revisions of "Corpora View"
From Anote2Wiki
Anote2Wiki (talk | contribs) (Created page with "Category:HOWTOs After Start Corpora Plug-in in the Corpora View the user can view available Corpora. For charging one Corpus to clipboard t...") |
|||
| (13 intermediate revisions by one other user not shown) | |||
| Line 1: | Line 1: | ||
[[Category:HOWTOs]] | [[Category:HOWTOs]] | ||
| − | + | When you click the Corpora datatype in the clipboard, the view for the object appears in the right hand side panel. | |
| − | + | This view includes a table, where each row represents a specific corpus, being given the id, name and properties of the corpus. | |
| − | + | To load a specific Corpus to the clipboard, select the appropriate row in the table and click the rightmost icon (highlighted by a red circle in the figure). | |
| + | |||
| + | The Corpus datatype object now appears in the clipboard ('''red arrow'''). | ||
| + | |||
| + | |||
| + | [[File:Corpora_LoadCorpus.png|1500px|center]] | ||
| + | |||
| + | |||
| + | This view can also be used to remove a Corpus (check [[Corpora Remove Corpus]]) | ||
Latest revision as of 10:38, 18 January 2013
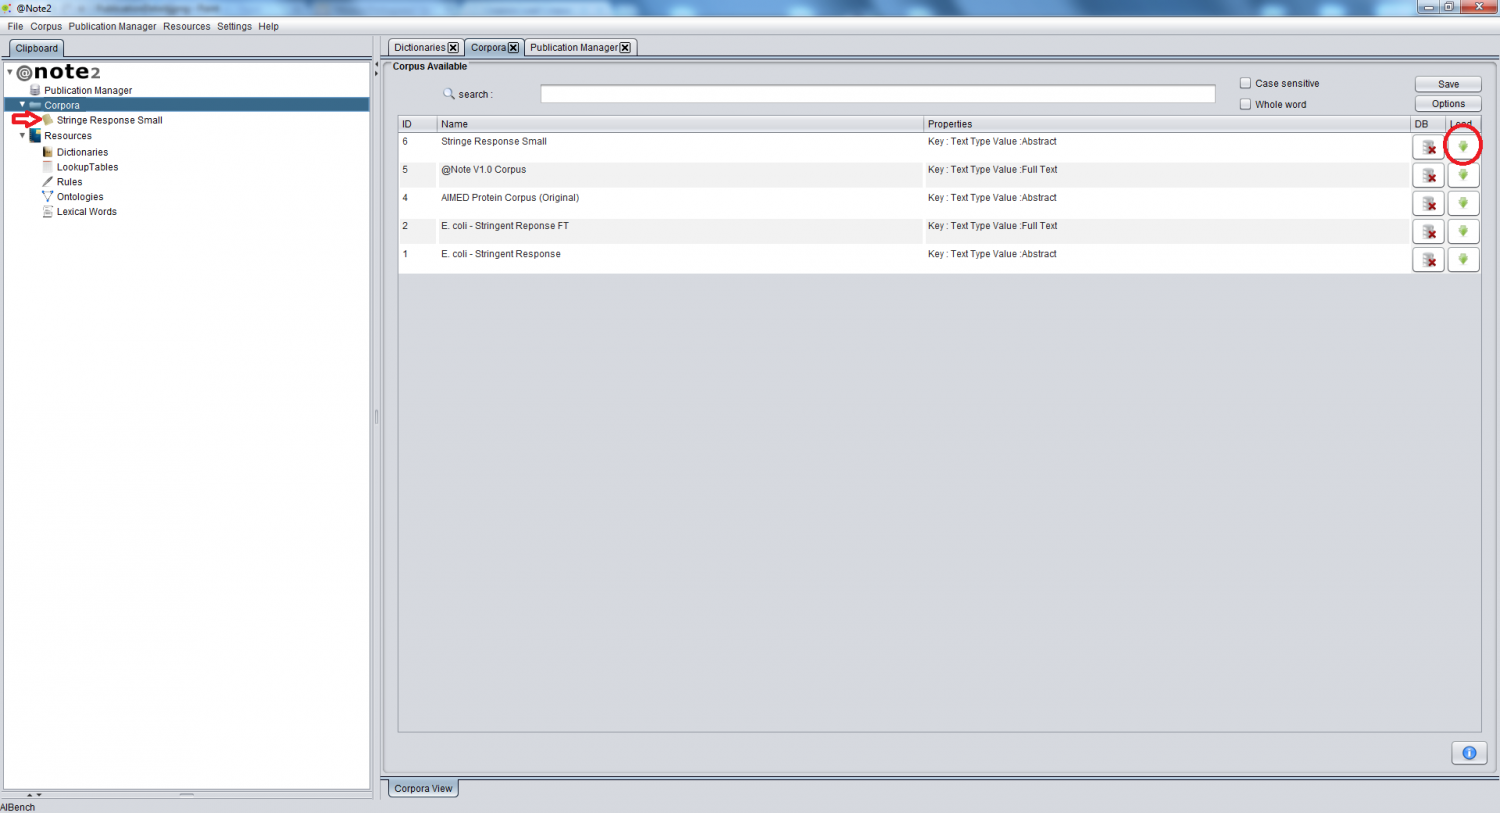
When you click the Corpora datatype in the clipboard, the view for the object appears in the right hand side panel.
This view includes a table, where each row represents a specific corpus, being given the id, name and properties of the corpus.
To load a specific Corpus to the clipboard, select the appropriate row in the table and click the rightmost icon (highlighted by a red circle in the figure).
The Corpus datatype object now appears in the clipboard (red arrow).
This view can also be used to remove a Corpus (check Corpora Remove Corpus)
